Published: February 9, 2026
Stop the post-demo panic! Learn how to use our Visual Severity Scale to identify drywall damage and choose the right repair method—from simple scuffs to the dreaded 'Fuzz-Bubble'—for a professional-grade finish.
Post-Demo Panic? The 3-Step Visual Guide to Saving Your Walls
We’ve all been there: the wallpaper finally comes down, the old tile is chiseled away, or that dated mirror is off the wall. You’re ready for the "fun" part—painting or tiling—but instead, you’re staring at a disaster zone. The wall looks like a topographical map of a very messy planet.
At TigerDen, we know the temptation is to grab a bucket of joint compound and start slathering. Don't.
When it comes to wall prep, a "one-size-fits-all" approach leads to bubbling paint, cracking mud, and wavy tile. To get professional results, you need to diagnose before you fix. Welcome to the TigerDen Visual Severity Scale—your roadmap to a perfect finish.
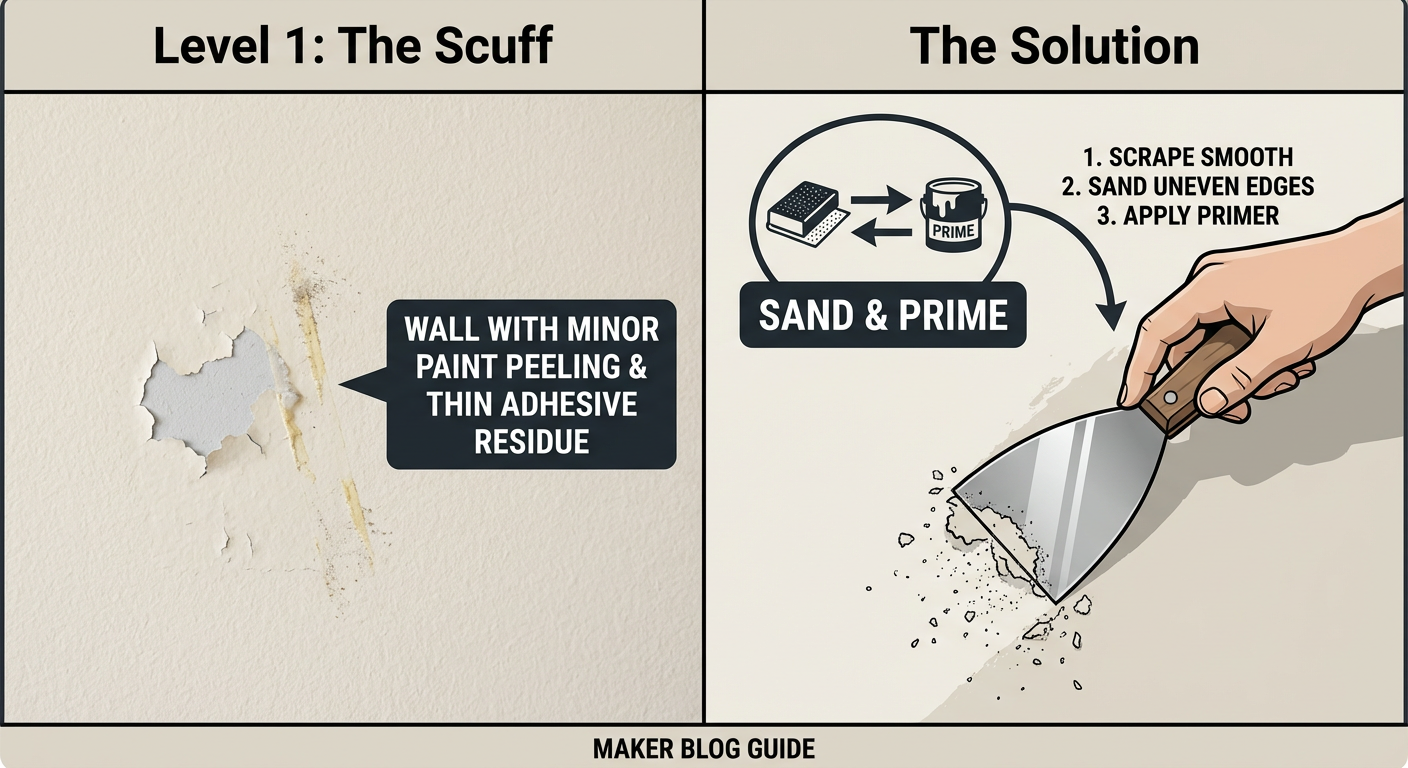
Level 1: The Scuff (Surface Only)
The Diagnosis: This is the best-case scenario. The drywall’s integrity is intact, but the surface is messy. You’ll see thin ridges of old adhesive, tiny bits of wallpaper backing, or minor paint peeling where the bond failed. Crucially, the gray or white paper of the drywall is still solid and not torn.
The Fix:
- Scrape: Use a 4-inch stiff drywall knife to knock down any high spots or ridges.
- Sand: Lightly scuff the area with 120-grit sandpaper to ensure the next layer bonds.
- Prime: Even for minor scuffs, a quick coat of standard primer ensures your new paint won't "flash" (look different) over the repaired spots.
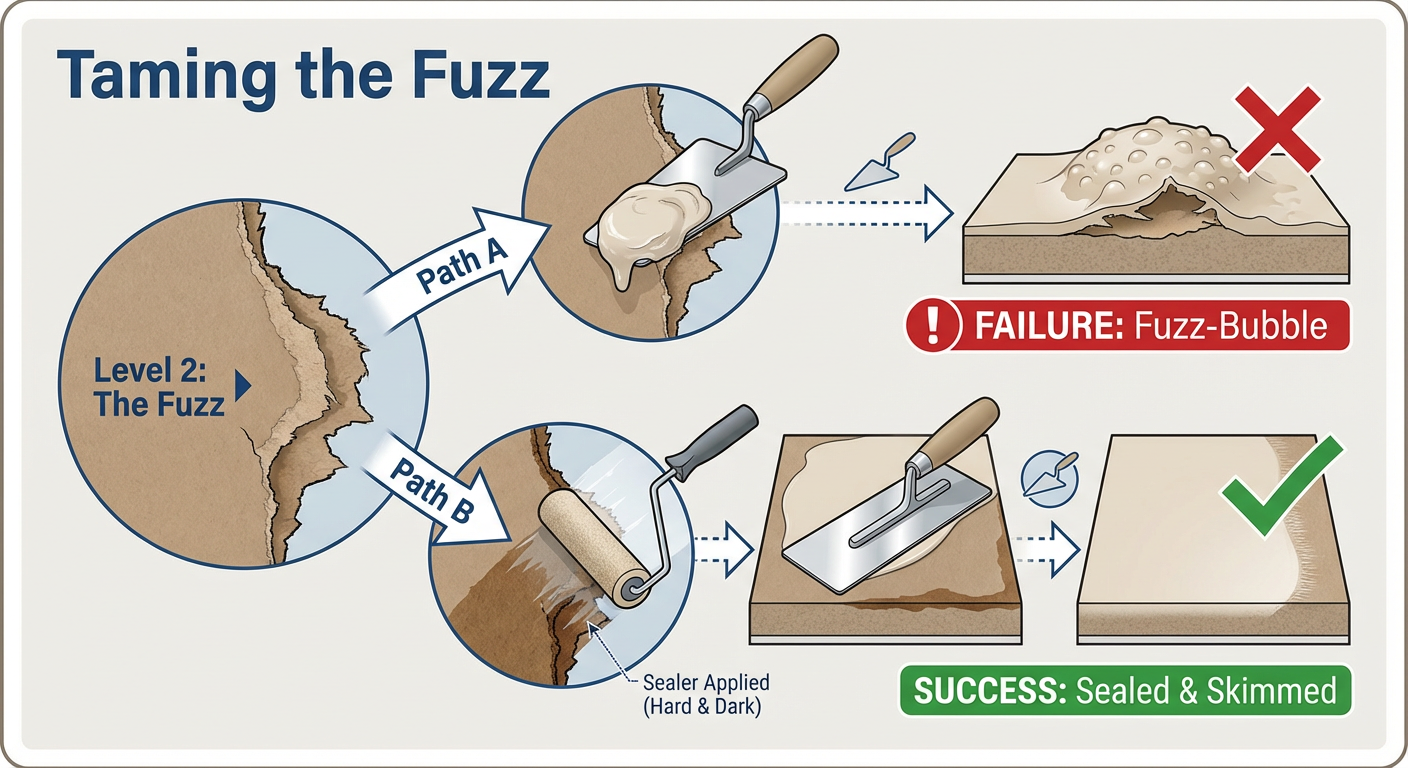
Level 2: The Fuzz (Torn Paper - CRITICAL)
The Diagnosis: This is where DIY projects often go off the rails. You’ll see patches of brown, "fuzzy" paper. This happens when the top layer of the drywall paper is ripped away with the old decor.
The Danger: If you put water-based drywall mud directly onto this "fuzz," the paper absorbs the moisture and swells. This creates the dreaded "Fuzz-Bubble"—a blister in your wall that no amount of sanding will ever fix.
The Fix: You must SEAL IT FIRST.
Before any mud touches the wall, use a specialized sealer like Zinsser GARDZ or a high-quality oil-based primer. These products soak into the fibers and turn them rock-hard, creating a waterproof barrier. Once dry, you can skim-coat with mud as usual.
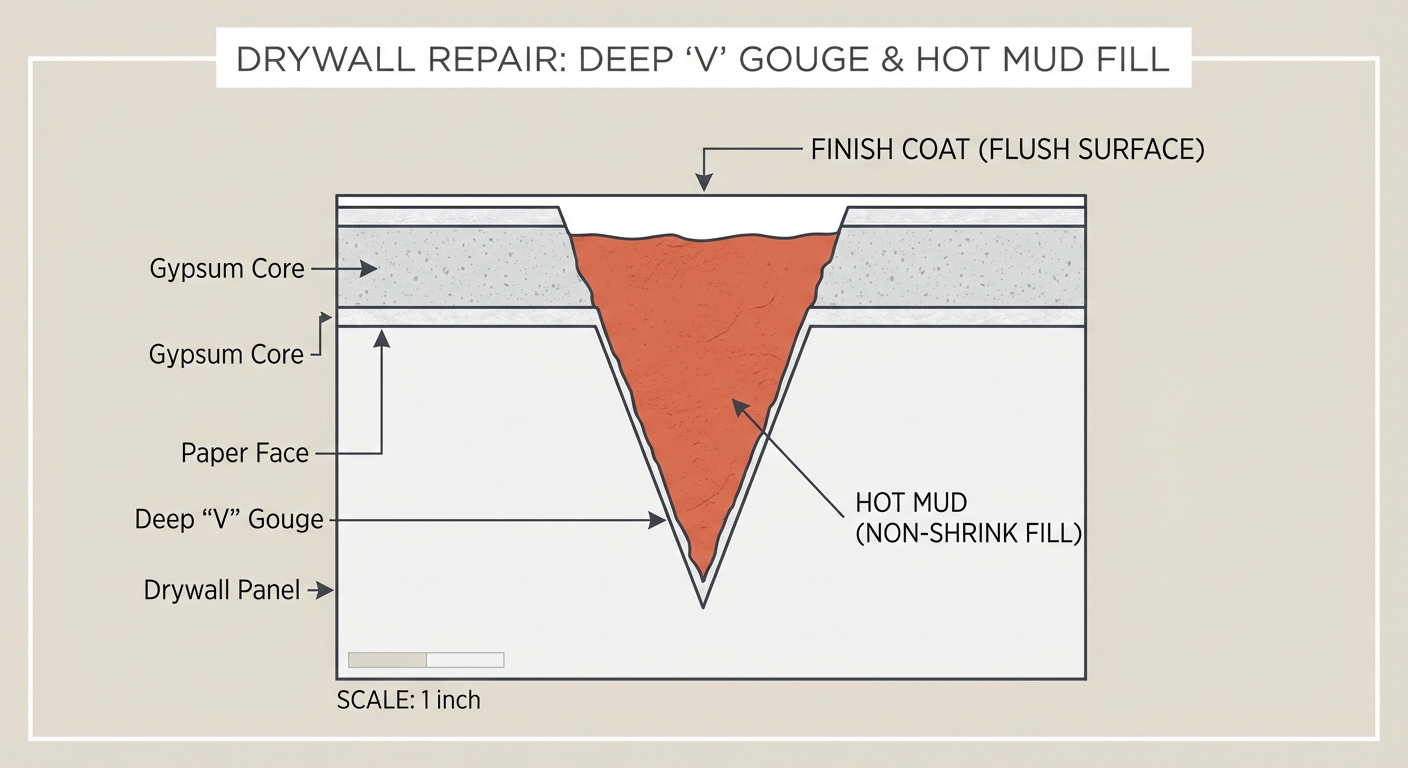
Level 3: The Gouge (Deep Damage)
The Diagnosis: The demo was rough. You can see the white, chalky gypsum core of the wall, or there are actual chunks missing.
The Fix: Standard pre-mixed all-purpose mud (the stuff in the big green bucket) shrinks as the water evaporates. If you fill a deep hole with it, it will crack and cave in. Instead, use a "setting-type" compound, often called "hot mud" (it comes in powder form and hardens via a chemical reaction). It doesn't shrink and dries much harder. Fill the gouge slightly below the surface with hot mud, then finish with a thin coat of regular mud for easy sanding.
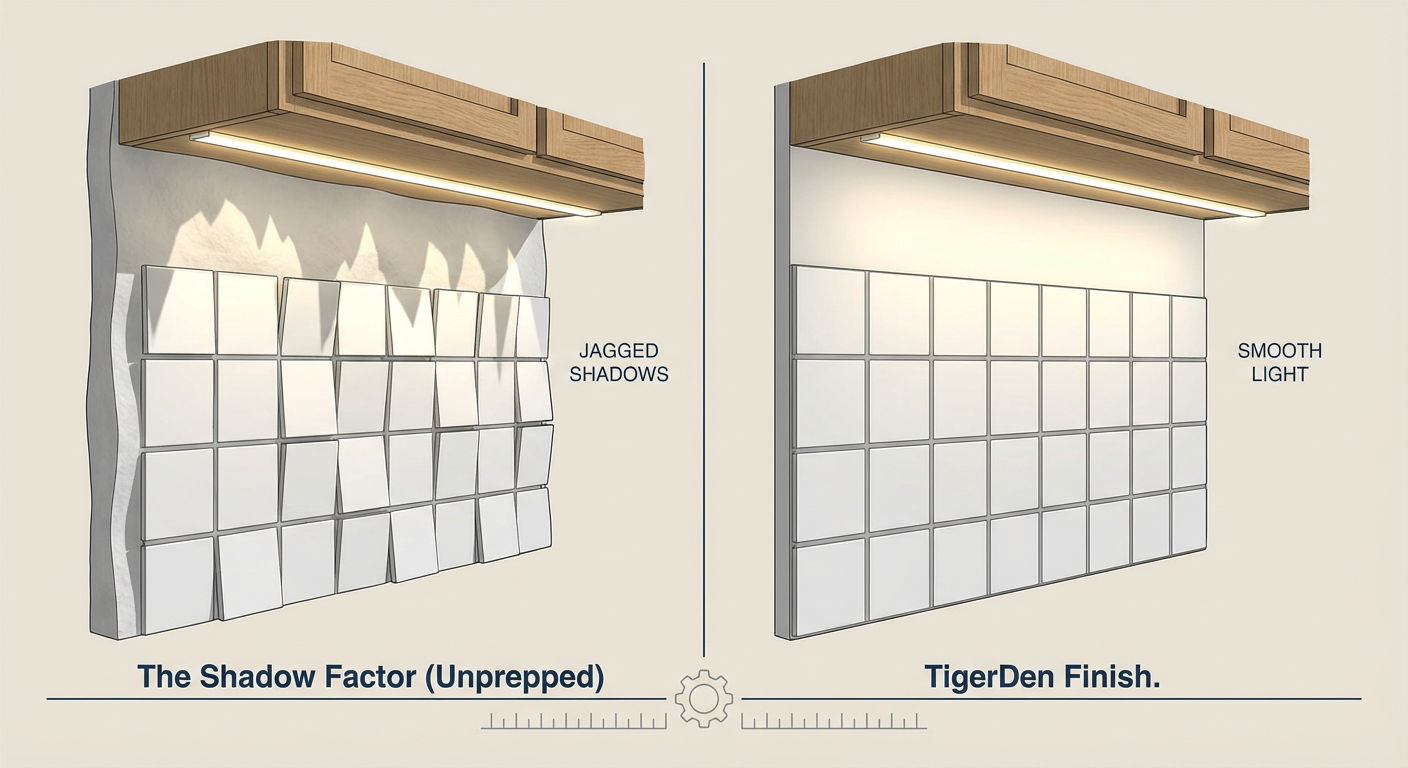
Bonus: The "Shadow Factor" Test
If you are prepping for a tile backsplash, "smooth" isn't enough—the wall needs to be flat.
Modern under-cabinet LED lighting is the ultimate snitch. It shines light straight down the wall, and any slight hump or dip in your drywall will cast a long, jagged shadow through your tile joints. Before you thin-set, take a bright flashlight, hold it against the wall, and shine it downward. If you see mountains and valleys, you need to do more skim-coating.