Published: February 1, 2026
Achieve a flawless, factory-sprayed look on your trim using just a brush! Learn the professional 'lay-off' technique and the secret of self-leveling paints to elevate your next woodworking project.
How to Get Spray-Quality Baseboards with a Brush
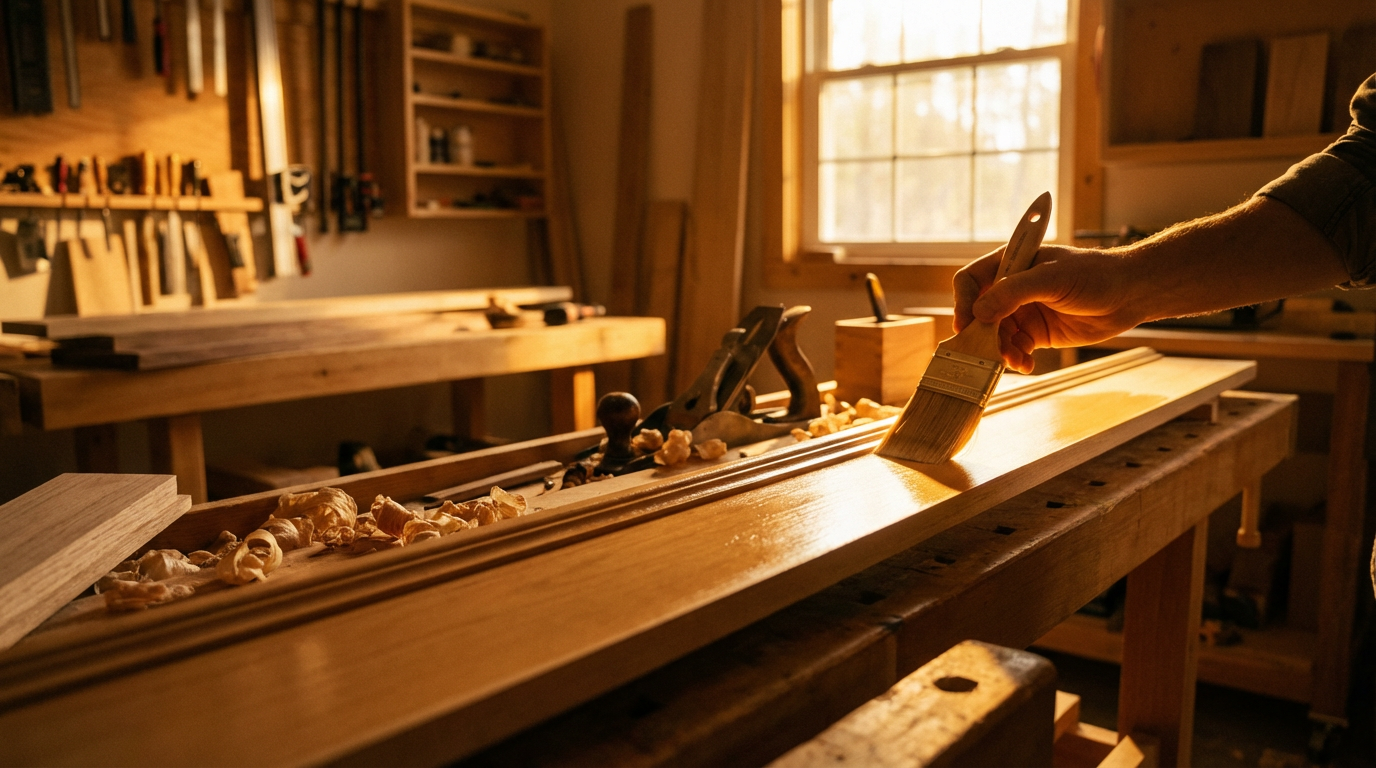
There is nothing quite like the crisp, glass-smooth finish of professional baseboards to elevate a room. For many makers, the "holy grail" of trim work is that flawless, factory-sprayed look. But what if you don't own an HVLP sprayer, or you’re working in a finished space where overspray is a nightmare?
The good news is that with the right technique and materials, you can achieve a finish so smooth your neighbors will swear you brought in a professional spray rig. Here at TigerDen, we believe in mastering the craft with the tools you have. Let’s dive into how to get spray-quality baseboards using nothing but a brush.
1. Preparation is 90% of the Result
You’ve heard it before, but it bears repeating: your finish is only as good as the surface beneath it. If your baseboards have nicks, nail holes, or grain texture, no amount of paint will hide them.- Fill the Holes: Use a high-quality wood filler or spackle for nail holes. Overfill them slightly, as these products tend to shrink as they dry.
- Sand it Level: Once the filler is dry, sand the baseboards with 120-grit sandpaper, followed by 220-grit for a buttery smooth surface.
- Tack Cloth is Key: After sanding, vacuum the area and use a tack cloth to remove every single speck of dust. Dust is the enemy of a spray-like finish.
2. Choosing Your "Secret Weapon" Paint
To get a spray-like finish, you cannot use standard "wall paint." You need a Water-Based Alkyd Urethane Enamel.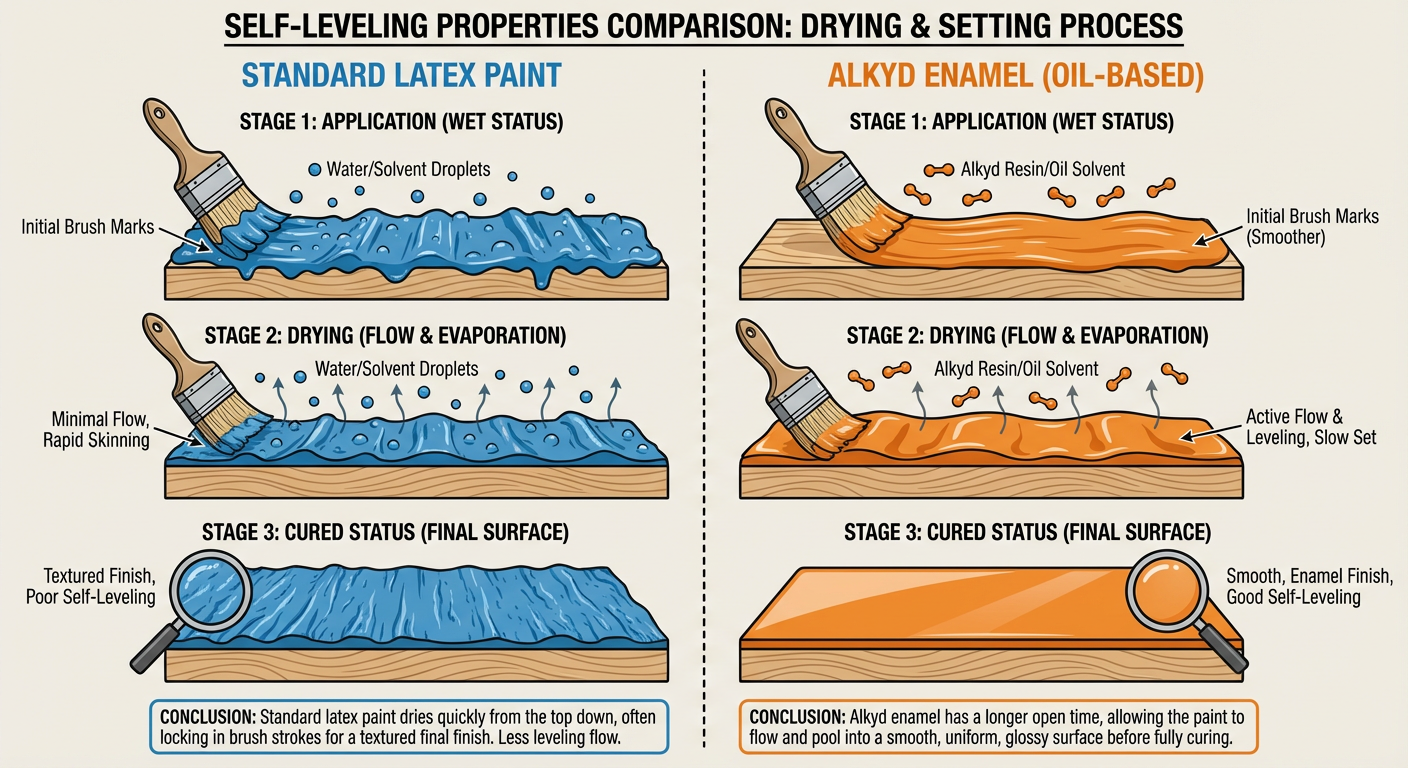
These paints are designed to be "self-leveling." This means that as the paint dries, the brush marks literally melt away, leaving a flat, hard surface. Brands like Benjamin Moore (Advance) or Sherwin-Williams (Emerald Urethane) are gold standards in the maker community.
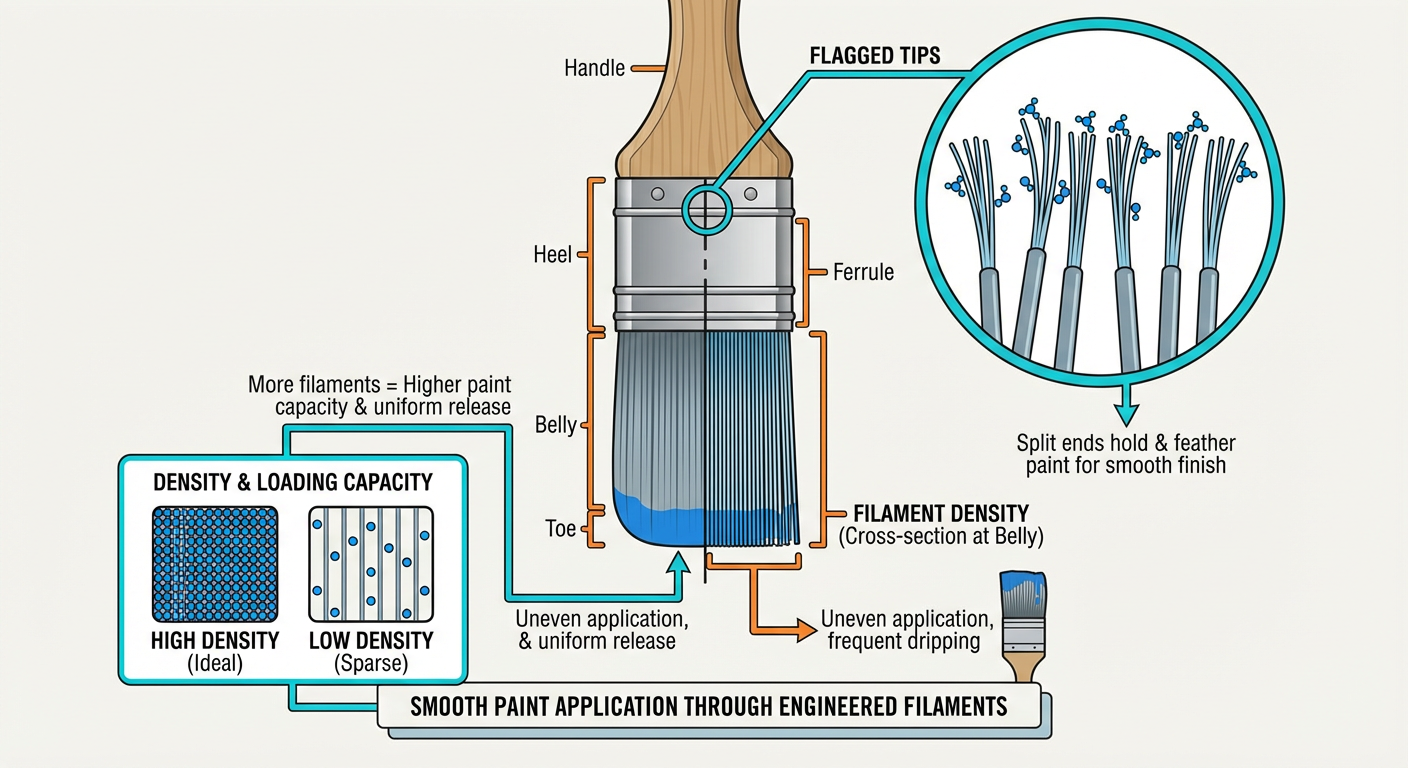
3. The Right Brush for the Job
Don't reach for the budget bin here. To avoid streaks, you need a high-quality synthetic brush with soft, flagged tips.- Material: Look for Nylon/Polyester blends.
- Shape: An angled sash brush (2-inch or 2.5-inch) gives you the control needed for the top edge of the baseboard.
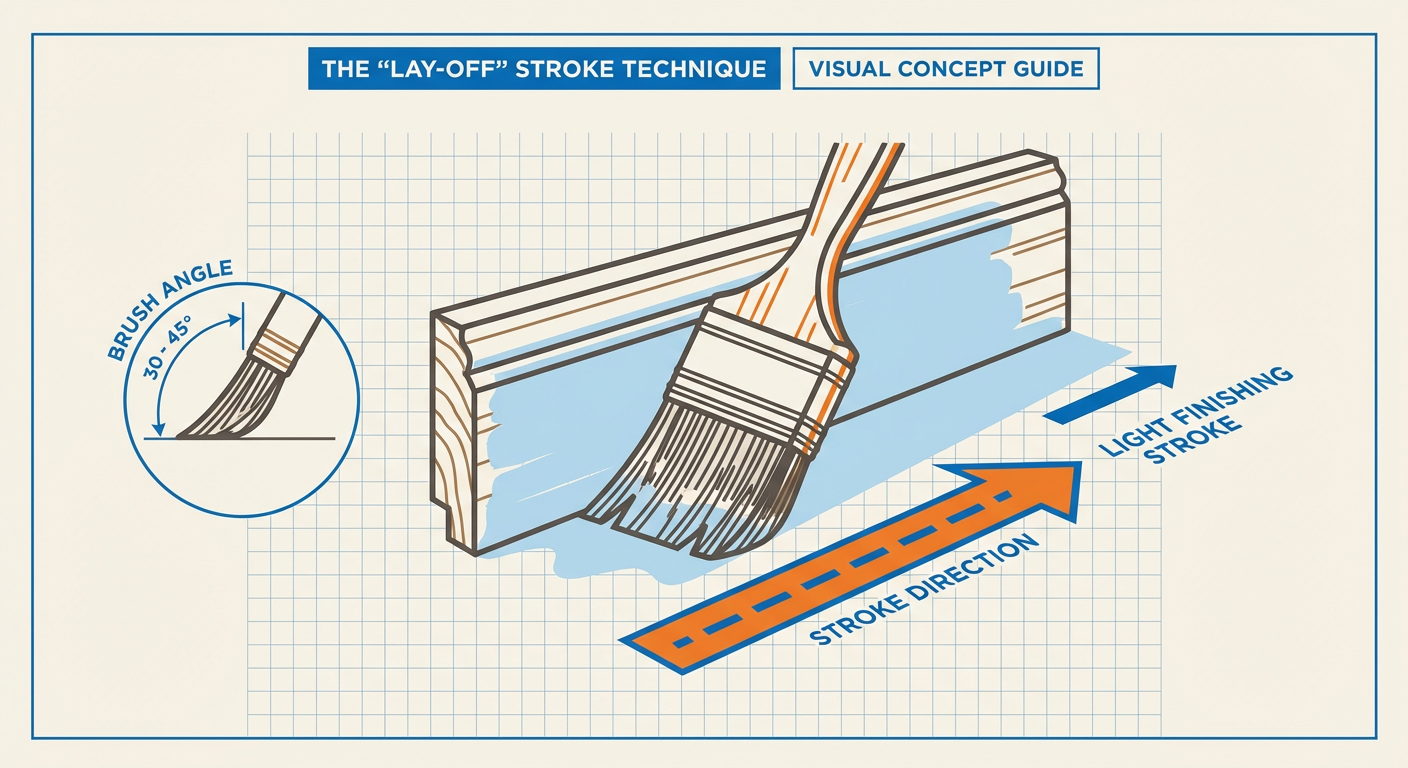
4. The "Lay-On and Lay-Off" Technique
This is the professional secret. The goal is to apply the paint and then let the self-leveling properties do the work without over-working the product.- Load the Brush: Dip your brush about 1/3 of the way into the paint. Tap it against the side of the bucket—don't scrape it. You want a "loaded" brush.
- Lay it On: Apply the paint to a 2-3 foot section of the baseboard in relatively thick, even strokes.
- Lay it Off: This is the magic step. Take your brush and, starting from the unpainted area, lightly pull the brush through the wet paint in one continuous, long stroke. Use almost zero pressure. This "feathers" the paint and breaks the surface tension of any bubbles.
- Walk Away: This is the hardest part. As the paint starts to dry (within 2-5 minutes), stop touching it. If you try to fix a drip once the paint has begun to set, you will create a permanent texture.
5. Environment Matters
The reason spray booths work so well is because they are controlled environments. You can mimic this by:- Controlling Temperature: Paint dries too fast in hot rooms, which prevents it from leveling. Aim for 65-72°F.
- Extending "Open Time": If you are working in a dry climate, add a paint conditioner like Floetrol. This keeps the paint wet longer, giving brush marks more time to disappear.
Conclusion: Patience is a Virtue
Achieving a spray finish with a brush takes patience. You will likely need two thin coats rather than one thick one. Between coats, give the paint plenty of time to cure—alkyd paints take longer to dry than standard latex.Ready to upgrade your home? Grab a high-quality sash brush, some urethane enamel, and transform your trim! Show us your results in the TigerDen community forums. Happy making!
Sources: "The Art of Fine Trim Painting," Fine Homebuilding Magazine.* Technical Data Sheets for Alkyd Urethane Enamels, Benjamin Moore & Sherwin-Williams.* Professional Techniques for Architectural Coatings, Painting and Decorating Contractors of America (PDCA).*