Published: January 31, 2026
Unlock the secrets to the hallmark of master craftsmanship. Learn the step-by-step process for layout, sawing, and paring to achieve gap-free, heirloom-quality dovetail joints in your next woodworking project.
For the Real Artists... Perfect Dovetails Every Time
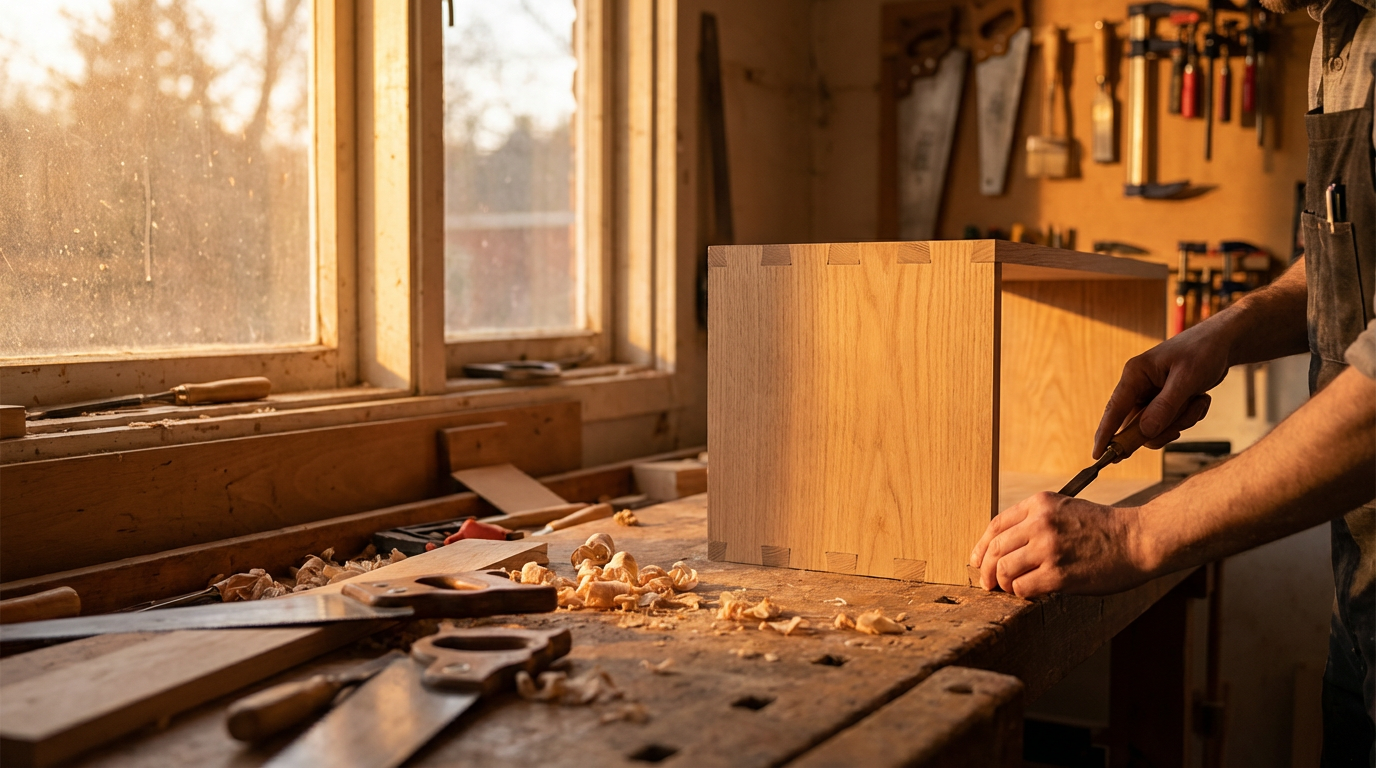
There is a reason the dovetail joint remains the undisputed hallmark of the master craftsman. It isn’t just about the mechanical strength—though a well-cut dovetail is nearly impossible to pull apart—it’s about the marriage of form and function. It is a visual statement that says, "I took the time to do this right."
At TigerDen, we believe that every maker has a masterpiece in them. Whether you are building an heirloom chest or a simple shop organizer, mastering the dovetail is your rite of passage. Today, we’re breaking down the process to help you achieve gap-free, "piston-fit" joints every single time.
The Foundation: Sharp Tools and Flat Stock
Before your saw even touches the wood, you must win the battle of preparation. You cannot cut a perfect joint on twisted or cupped lumber. Ensure your stock is perfectly square and consistent in thickness.
Equally important is the state of your chisels. If you can't shave the hair off your arm with your chisel, it isn't sharp enough for dovetails. Remember: dull tools require more force, and more force leads to slips and crushed wood fibers.
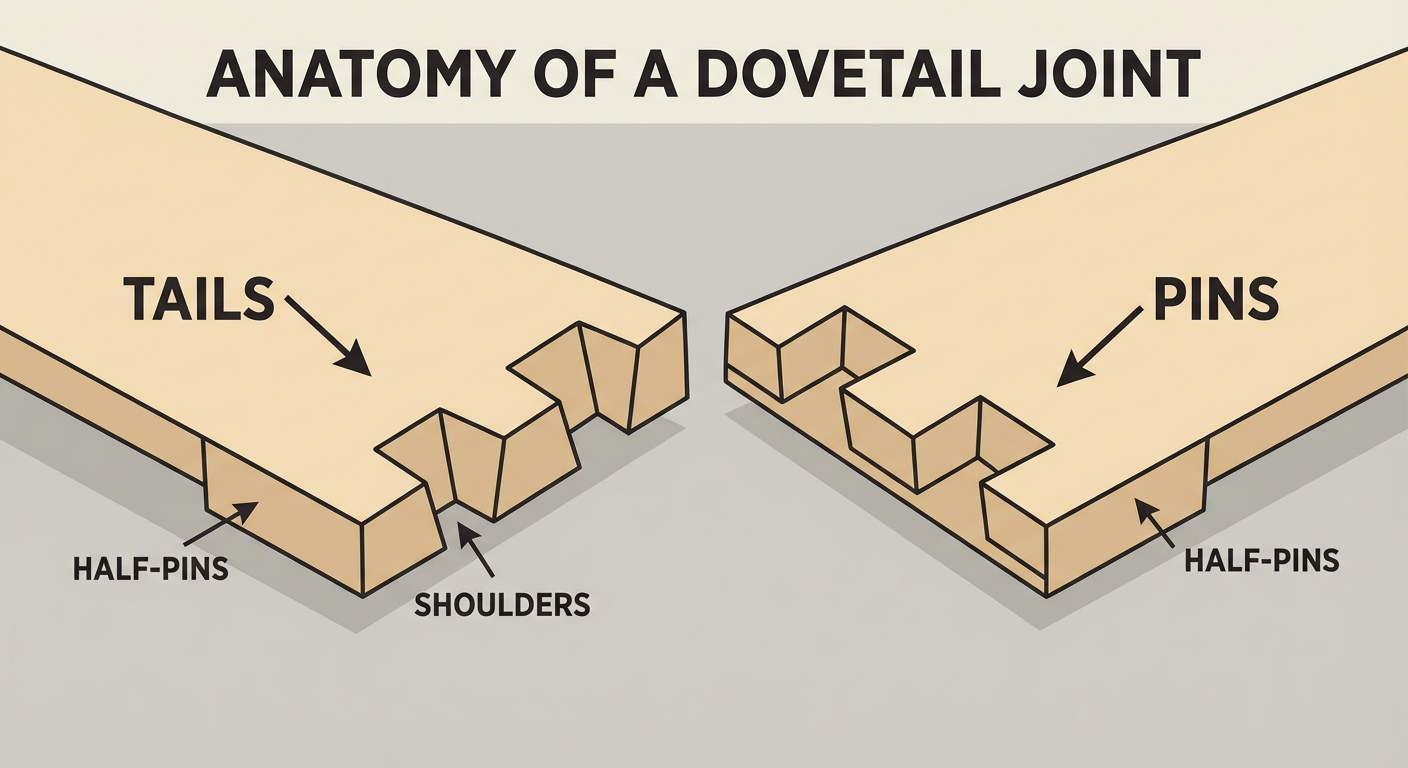
Step 1: Layout and Logic (Pins or Tails?)
The age-old debate: pins first or tails first? While both camp have their devotees, many artisans prefer starting with the tails. This allows you to use the actual cut tail as a template to mark your pins, ensuring a custom fit regardless of minor measurement deviations.
When laying out your tails, aim for a pleasing aesthetic—usually a 1:6 ratio for softwoods and 1:8 for hardwoods. Use a marking gauge to set the depth of your cuts slightly deeper than the thickness of your board; this allows you to plane the joint flush later for that professional finish.
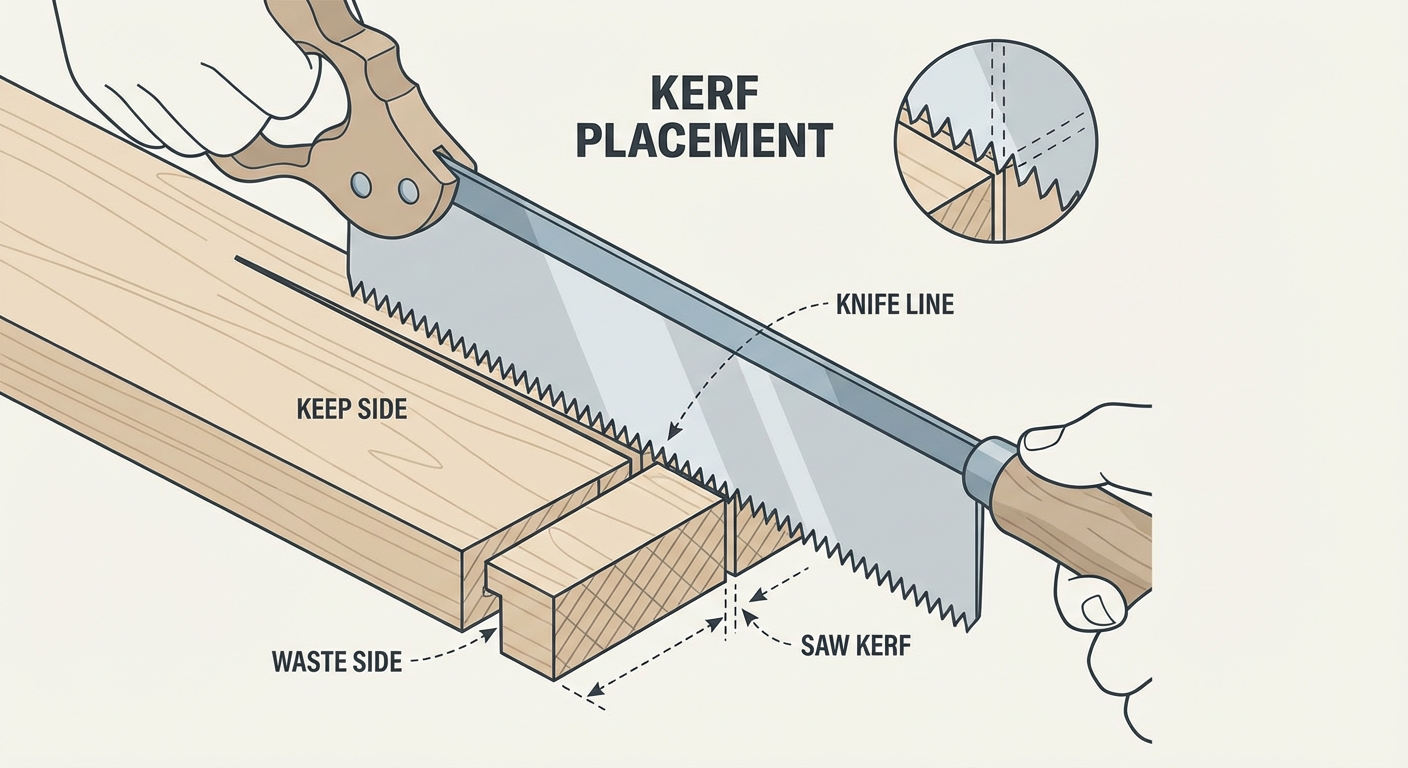
Step 2: The Art of the Saw Cut
The secret to a perfect fit isn't cutting on the line—it's cutting on the waste side of the line.
Keep your saw plate vertical and use a light touch. Let the weight of the saw do the work. If you find yourself white-knuckling the handle, take a breath and relax your grip. The goal is to leave the pencil or scribe line half-visible on the "keeper" side of the wood.
Step 3: Clearing the Waste
Once your vertical cuts are made, it’s time to remove the "basement" of the joint. Use a coping saw to remove the bulk of the material, staying about 1/16" away from your baseline.
Then, bring in your razor-sharp chisels. Work from both sides toward the center to avoid blowing out the grain on the back. This creates a slight "V" shape in the floor of the joint, which ensures the pieces seat tightly against the visible shoulder.
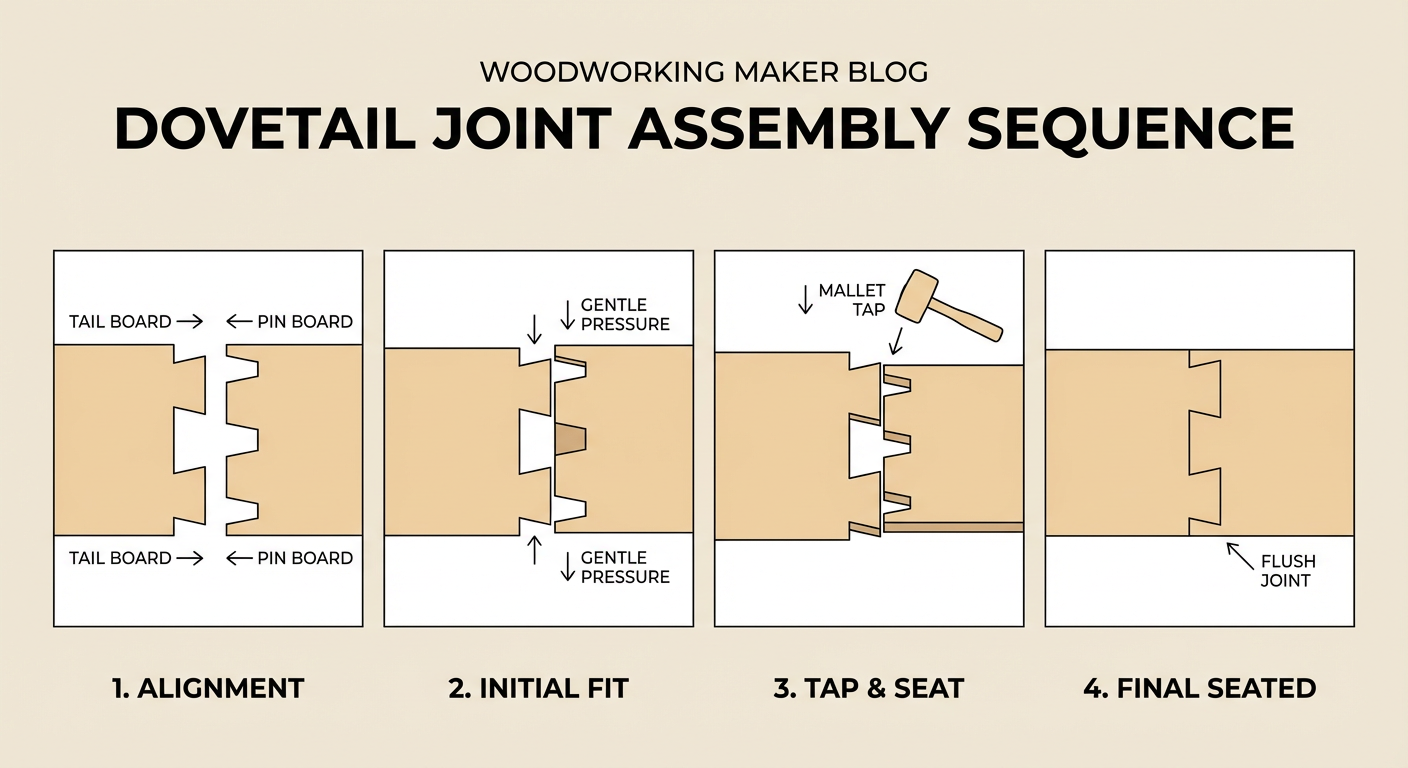
Step 4: The Final Fit
This is where the "real artists" shine. Never force a joint. If it doesn't slide together with firm hand pressure or light taps from a dead-blow mallet, find the high spots. Look for "bruising"—shiny spots on the wood that indicate where it’s rubbing—and pare away paper-thin shavings until the joint glides home.
Final Thoughts: Practice Makes Permanent
The first pair of dovetails you cut might have gaps big enough to hide a penny in. That’s okay! Every master started exactly where you are. The difference between a hobbyist and an artist is the willingness to keep refining the craft.
Ready to start your next project? Head over to the TigerDen forums and share a photo of your latest joint—gaps and all. We’re all here to learn, build, and grow together.
Keep making,
The TigerDen Team